
Should I remove my engine?
 02-19-2011, 11:40 PM
#21
Senior Member
Thread Starter

Join Date: Nov 2007
Location: Toronto, Canada
Posts: 429
Likes: 0
Received 0 Likes
on
0 Posts
Ok, so here's my latest update. From this week's tasks, I managed to:
Items missed:
Tomorrow my plan is to finish cleaning up engine bay, install rd2 steering rack.
While I'm waiting for the 1.8L pistons and beta2 head gasket, I plan to:
I wanted to share with you, some of this week's pics:
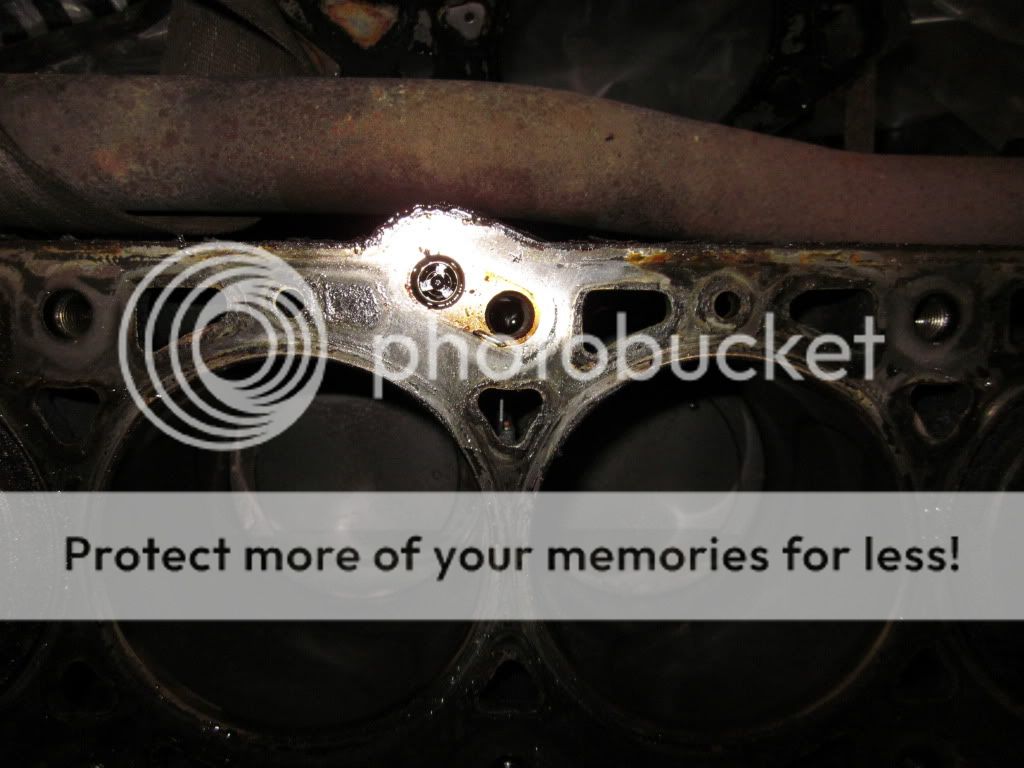
oil restrictor location (where you see the flash):
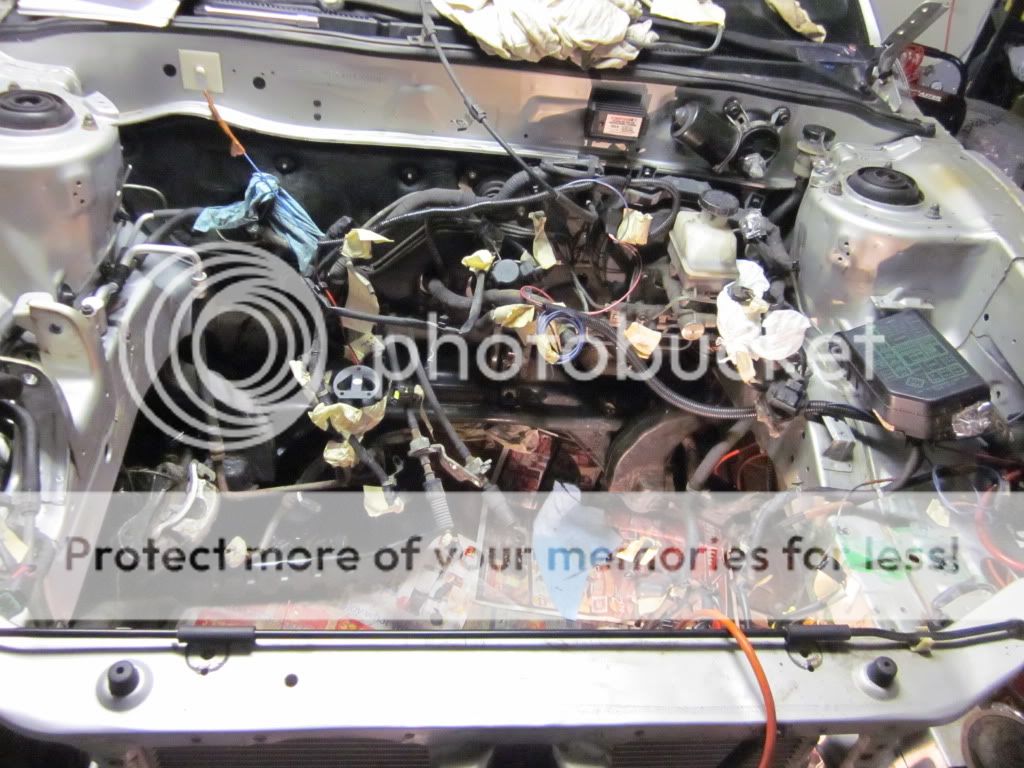
Engine bay before:

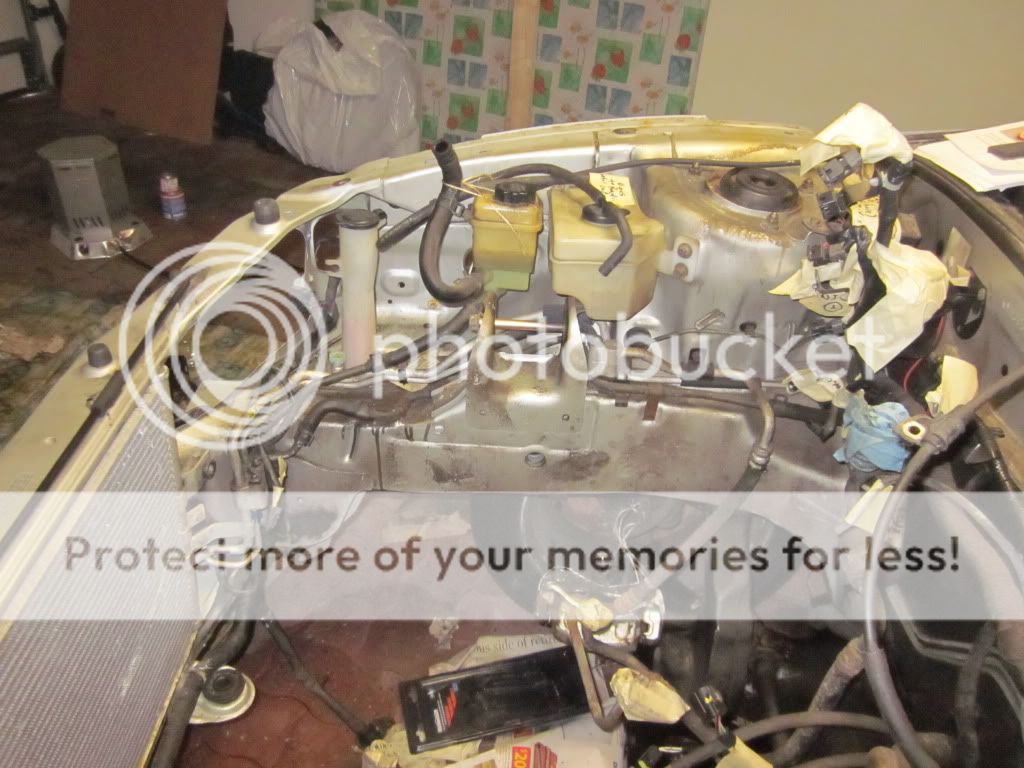
Engine bay after:
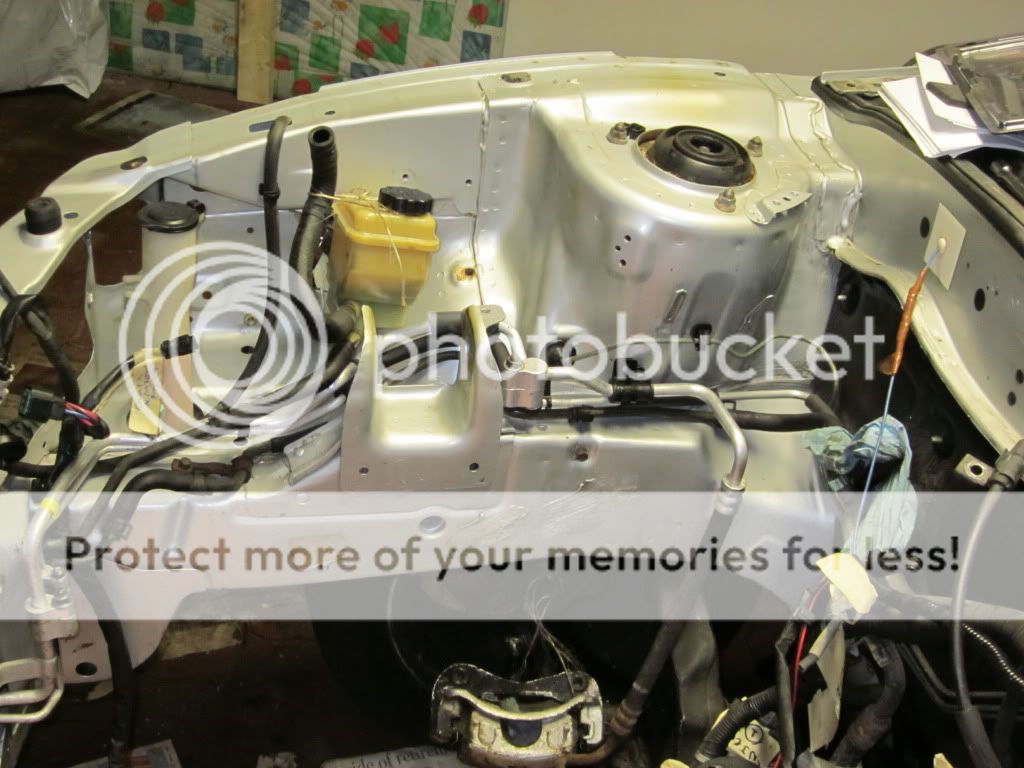
Passenger side before:
Passenger side after:
- tap into beta 2 exhaust cam
- removed oil restrictor
- beta 2 head and beta 1 block - dropped it off at the machine shop
- removed my old steering rack, just need to install the new one
- removed most accessories/lines/hoses from engine bay, and cleaned it up
- ordered 1.8L pistons and beta2 headgasket from kspec - they say shipping will take approx 3 weeks. That's going to delay getting my engine from the machine shop!!
 I hope I get this stuff quicker. What have been your experiences with the shipping and service from kspec?
Items missed:
- LSD install
- engine re-assembly
Tomorrow my plan is to finish cleaning up engine bay, install rd2 steering rack.
While I'm waiting for the 1.8L pistons and beta2 head gasket, I plan to:
- LSD install
- install master clutch cylinder (mine seized)
- replace one of my Lower control arms
- paint engine bay (lower half black, top half metallic blue)
- repair and paint Liz' (tibbychick) Gorilla widebody fenders
- paint my Evo hood
- Longer ARP wheel studs for 20mm spacers front, 10mm rear
- KYB GR2 strut installs (front and rear)
- 01 XG350 brake calipers, and 2005 Kia spectra rotors (front only)
I wanted to share with you, some of this week's pics:
oil restrictor location (where you see the flash):
Engine bay before:
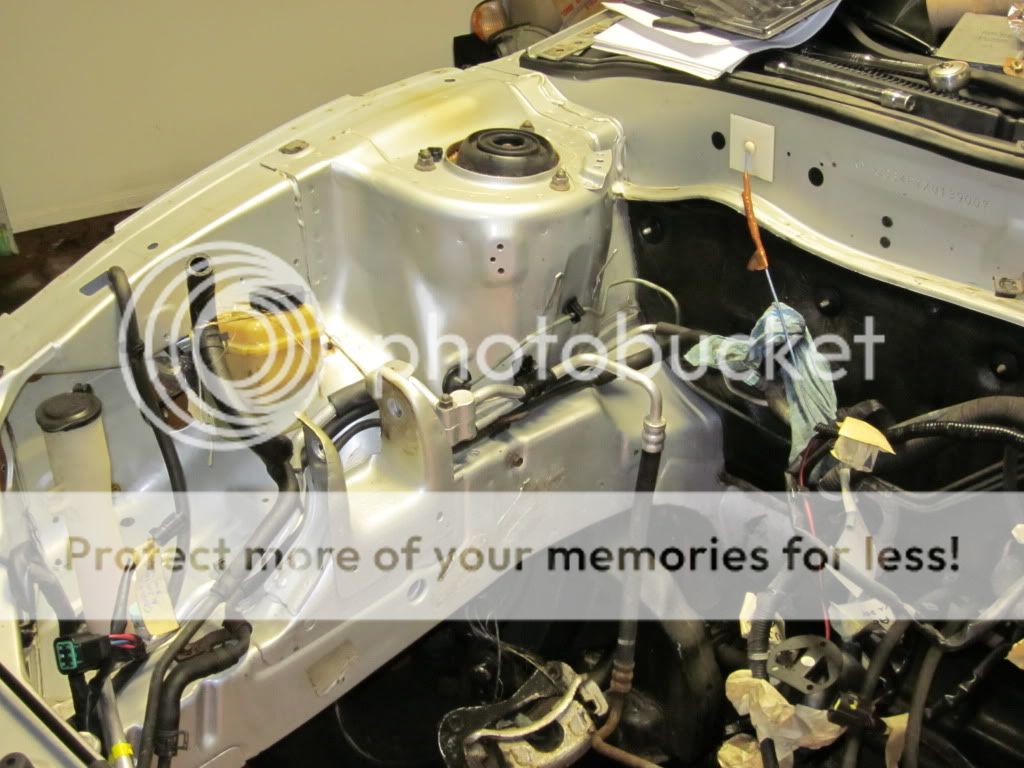
Engine bay after:
Passenger side before:
Passenger side after:
 03-18-2012, 01:06 AM
#23
Senior Member
Thread Starter
Join Date: Nov 2007
Location: Toronto, Canada
Posts: 429
Likes: 0
Received 0 Likes
on
0 Posts
I owe you all an apology for not logging in to the forum for a year now. My life got really busy, and my schedule/priorities altered between work, and my first newborn son:

Some general tips for anyone thinking/planning to remove their engine:
ENGINE REMOVAL:
main things to remember:
Let me give you all an update on what happened with the removal and rebuild of my engine:
After my engine was removed, I used engine degreaser, and cleaned up the engine bay really good, as you can see from the pics above. Again, take your time. The end result is worth it. I think it was stocker who suggested I paint the engine bay "black, or grey, or whatever colour dirt is" - he's right. Paint it a light colour, and man, it just seems like it gets dirty so quickly. I also used POR15, one of the best rust paints out there.
I replaced my steering rack, both half shafts, the dust covers on the front spindles, and both front wheel bearings. Unfortunatately, the dust cover over the calipers was practically disintegrated with rust. Replacing it, means that you have to get the bub separated from the spindle, which means that you have to replace the wheel bearings! ANNOYING and expensive. You have to press them (which means you have to take them to your local garage to press them out and the new ones in). My wheel bearing were new, but I had no choice but to replace them again so as to replace the dust cover.
Why did I replace my steering rack, because it was leaking. I got a used one from an RD2, for $100.
Brakes and suspension:
I replaced my front stock calipers with those of a 2001 XG 350, nickel/zinc plated 2005 Kia Spectra rotors, and Goodridge braided stainless steel brake lines. Rears, I kept my stock calipers, nickel/zinc plated cross-drilled/slotted stock-size rotors, Goodridge SS brake lines. I also painted my calipers blue (with a brush versus spray gun). Again, I used POR15 blue paint, and I painted it thick. I found that spray paint peels off easily, and chips easily too, bringing back the rust. Honestly, I spent a lot of money on this car, so I didn't get the calipers (nor headers) powder coated. I strongly suggest you do this over painting (like I did) if you have the money. It's worth it, especially if you live on the rust belt. Changed fluid to DOT 4 synthetic. You can't use DOT 5, for somme reason. I think it has to do with seal damage, but I can't remember now.
I replaced all 4 stock springs and struts (after 130,000km) with 4 stock springs I bought from someone on rdt, some time back, and KYB gr2 struts. The springs were in EXCELLENT CONDITION! I can't remember who I bought it from, but I bet the guy lived somewhere in the states where it didn't snow (much). My stock springs were rusted! I painted my struts with silver POR15. Big time rust removal from upper strut mount area of the body (all 4 sides). I later found out that there are "quick struts" (springs and struts are already pre-assembled, so in hindsight, I would have probably done that instead of replacing/installing each seperately. Apart from the obvious benefit of more work, I hear that it eliminates the need for an alignment, afterwards (not sure if that's true, that's what one mechanic told me).
Wheel alignment - I took it to a local mechanic. The guy tells me that my camber is out-of-spec, and that I need a camber kit. He wanted to charge me $200CDN just for the 4 bolts, one for each side. I decided to follow the wheel alignment diy at elantraclub:
4 wheel alignment diy from elantragtclub
I haven't done it yet, as I'm dealing with another problem I mention below.
Engine:
I took my beta 1 block with my beta 2 cylinder head to a machine shop. The guy told me that my beta 1 block was garbage because there were grooves caused on the crankshaft lobes and where the thrush bearings go, I think. Honestly, I can't remember exactly where the grooves were, that he mentioned, but I think it was that. So I opted to go with the beta 2 cylinder head and beta 2 block. I asked them to shave the block, cylinder head, valve reseating, replace valve stems, cylinder honing, install new pistons (the 1.8L pistons for higher compression), piston rings. They charged me $850CDN. Cylinder head came back immaculous!!! WOW! Worth the $850! Ok, so all of this cylinder head work, was the only thing I fore-went. I had already spent a lot of time on the car, and I knew this was going to delay me further, to learn all about how to do that, buy additional tools, and risk messing something up.
Ok, so I assembled the cylinder head to beta 2 block, with the beta 2 head gasket. When I installed the OBX lightweight crank pulley, the crank bolt wouldn't screw onto the crankshaft. #$%@!!!! I wasn't sure why. Can you guys imagine not being able to bolt the crank bolt!! Anyway, I risked it and used the rotary tool with a 1/64" cut-off wheel, and grooved the begining threads of the crank bolt! I was scared! Thankfully, after a couple of hours of going at it, I got the crank bolt to screw into the crankshaft. I Installed the oil pump, water pump, oil pan (beta 2), timing belt (new tensioner and pulley), light weight power steering pulley. The next problem was finding out all of the belt sizes given that I was using a smaller crank pulley, light-weight beta 1 power steering pulley, beta 2 water pump pulley, beta 1 a/c pulley/pump. The combinations made finding the right belt sizes, a project on its own. I followed the diy on here for the belt sizes, as a GUIDE. Anyone reading that thread will see that there was no concensus on what belt size to use, even for the same year RD/RD2. I can post what size belts I used, for anyone interested.
Beta2 Transmission:
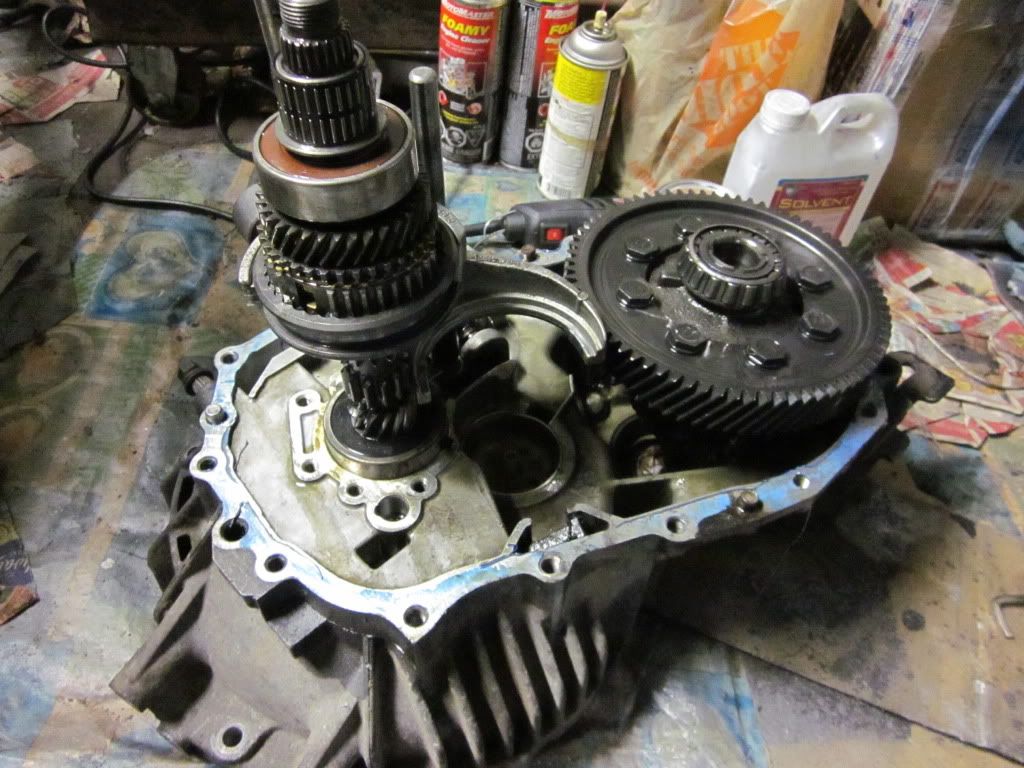
I took the transmission apart to bear-bones to install a the Phatom Grip LSD. I learned a great deal! I want to write a diy on doing this. It was fun! So after the tranny was back together, I installed the lightweight XTD flywheel, newer stock clutch that I bought from a member on here (it was advertised as having only 5,000km - the guy wasn't lying. The clutch is in GREAT shape!). I used the Mitsubishi alignment tool to get the clutch aligned with the engine. Everything installed perfect.
I still find that on the beta2 tranny it's still hard to get into first gear, just like it was on my beta1 tranny, unless you pretty much come to 10km/h.
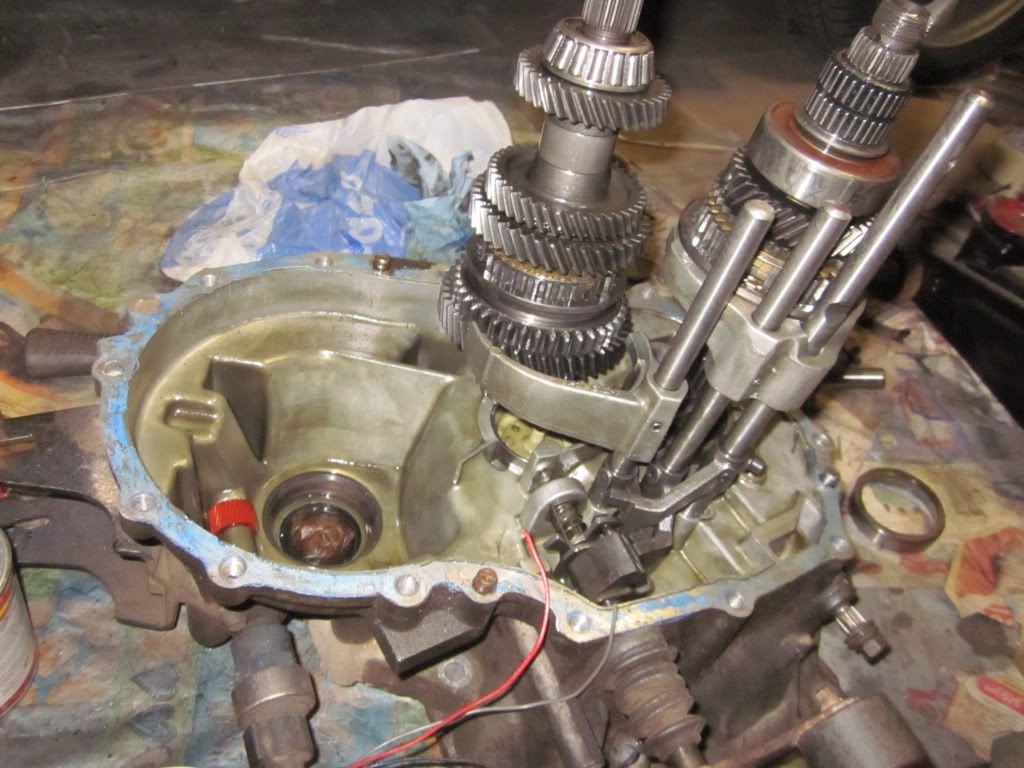
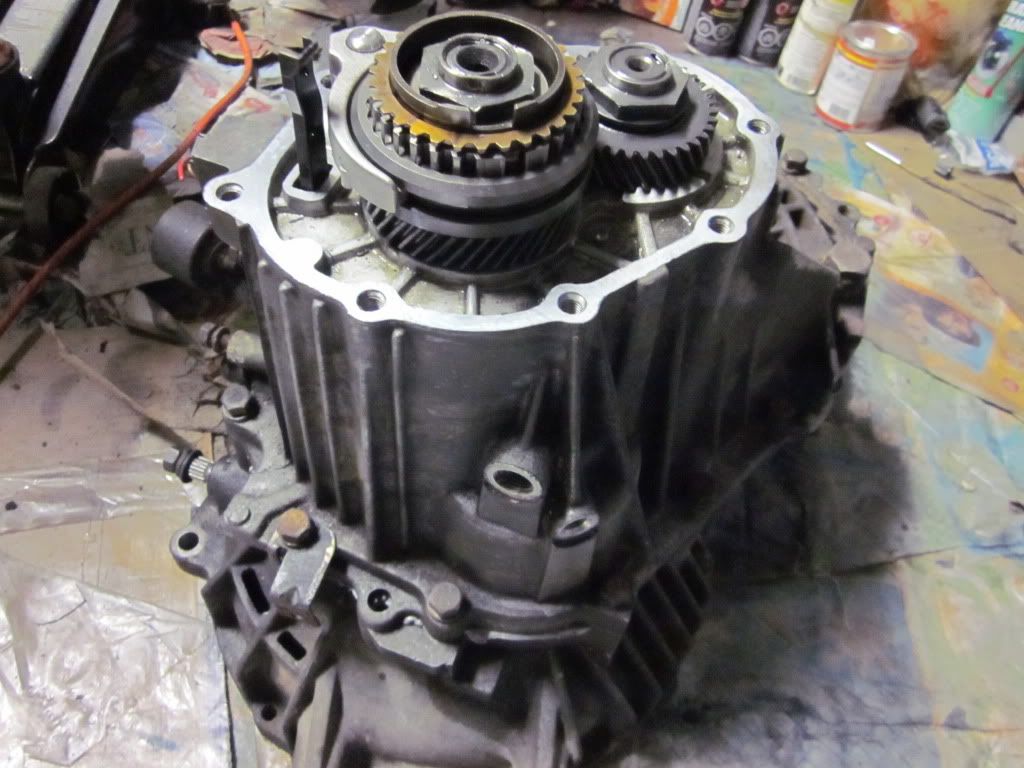
First and second gears removed:
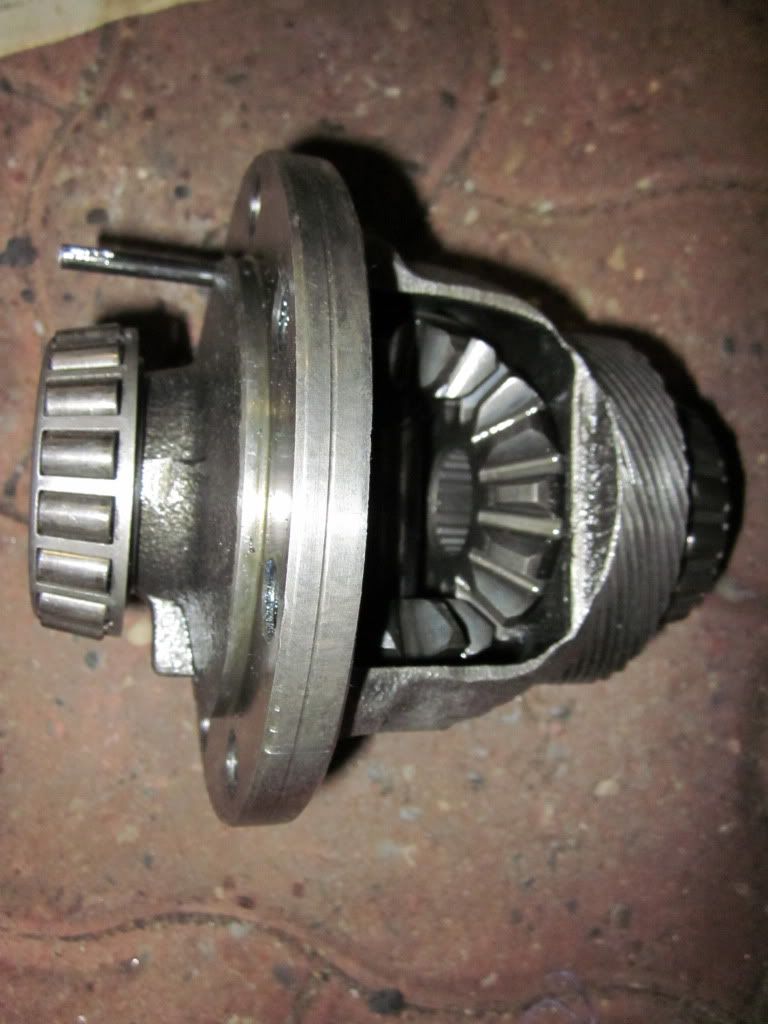
Closeup of the stock open differential:
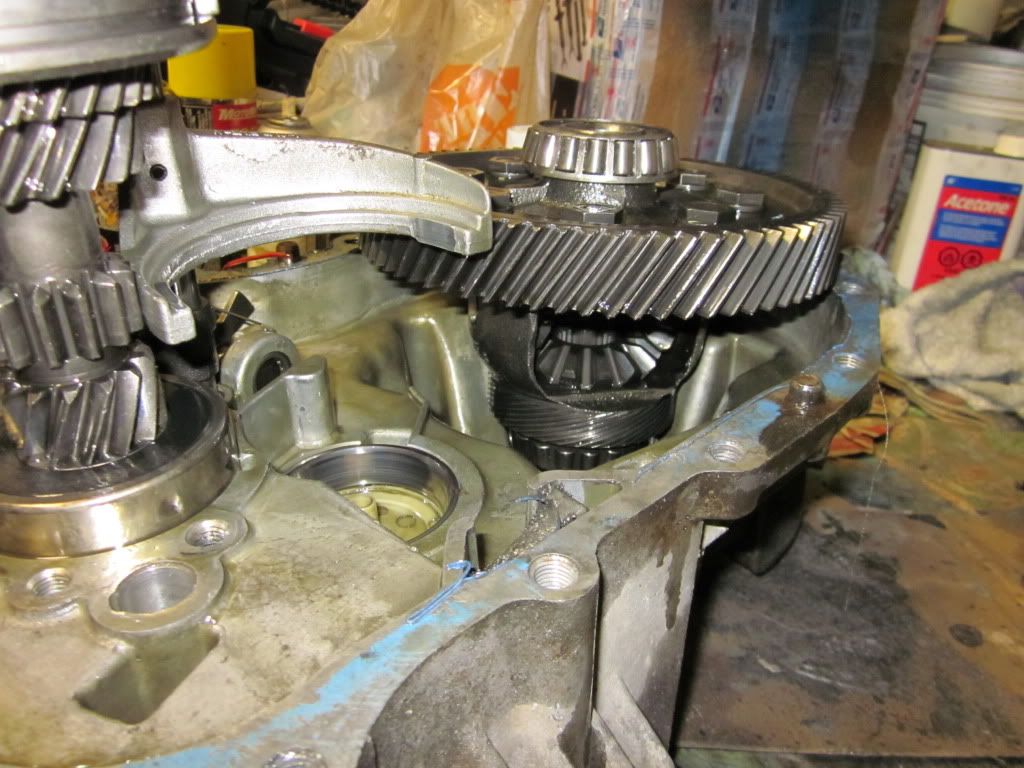
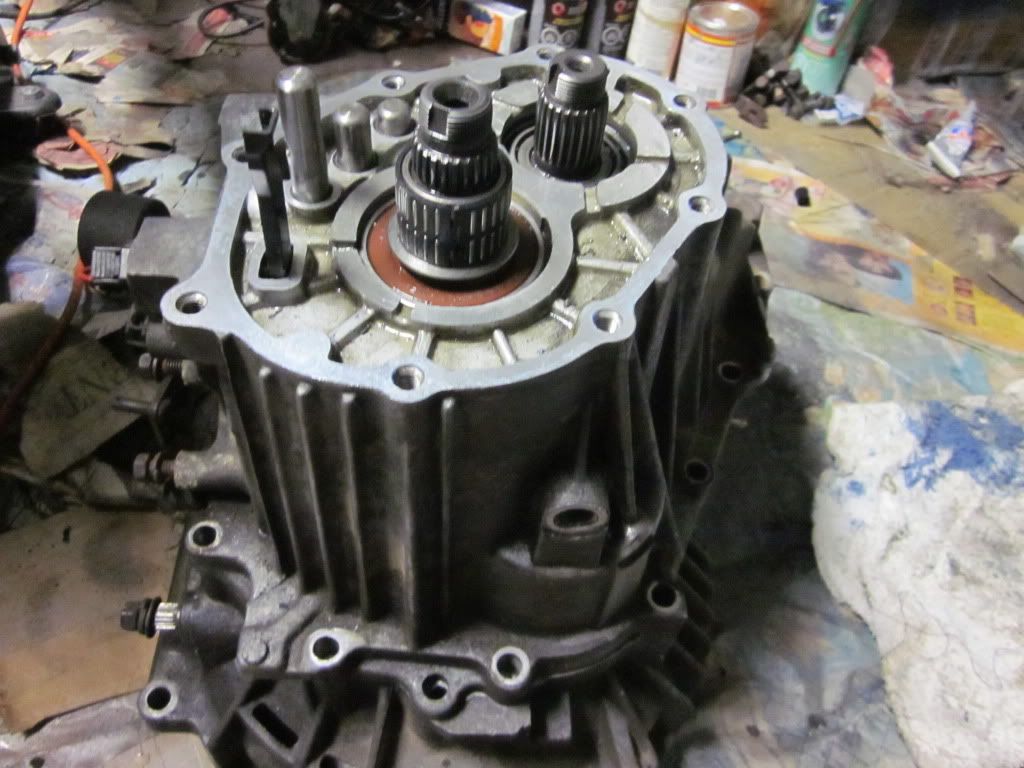
Tranny case without differential:
Stock open differential with pin removed (this pin can only be punched out this way, not the other way):
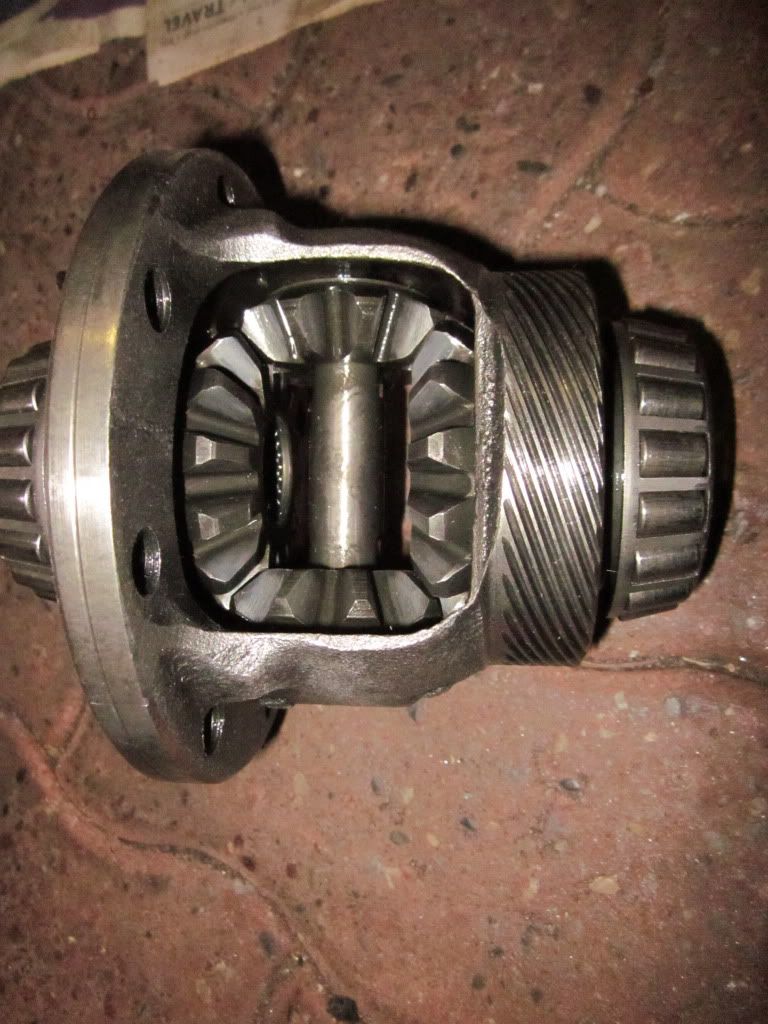
Spider gear in the stock differential:
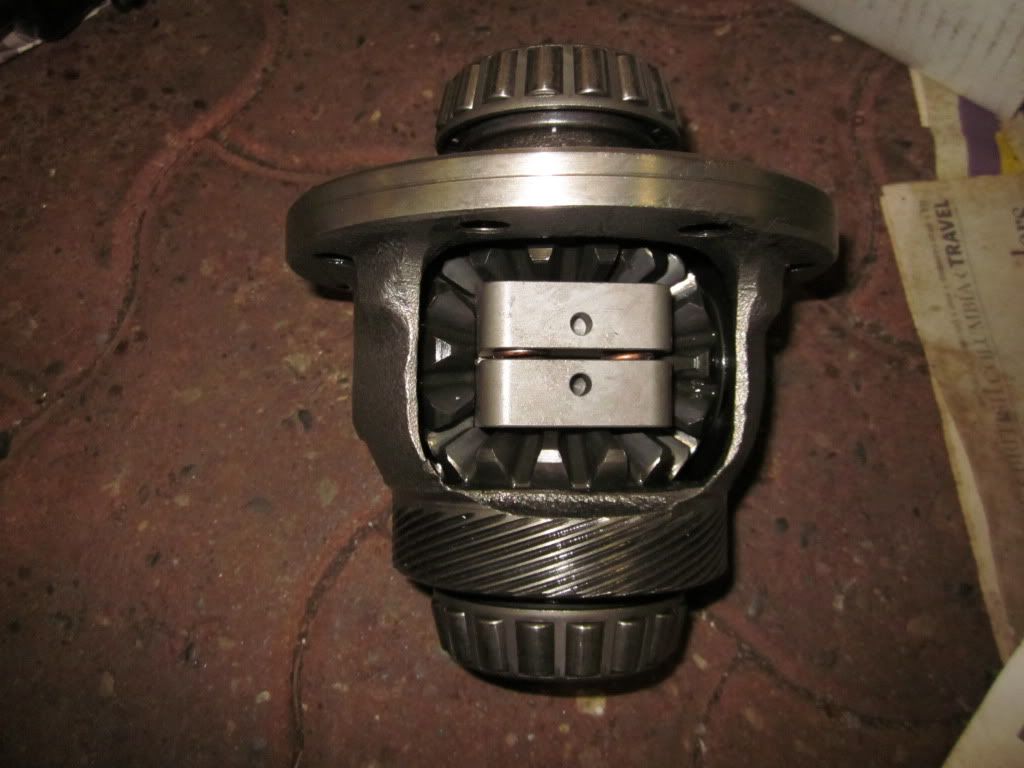
Phantom Grip installed in differential:
Differential put back in the case:
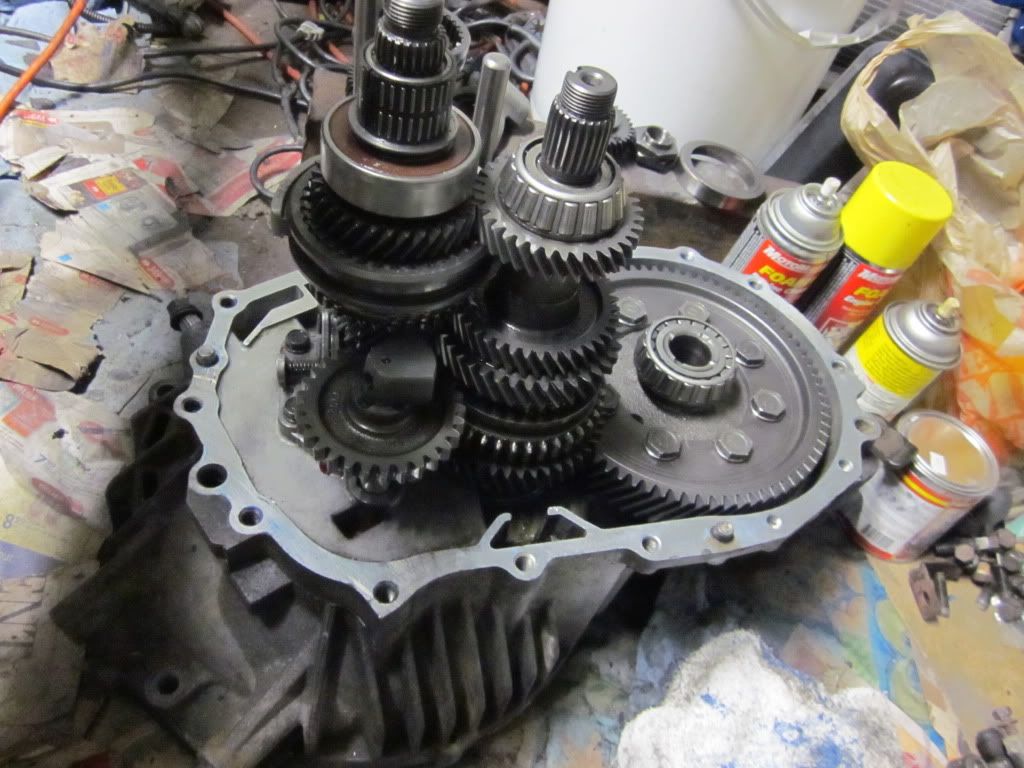
Top case installed:
Fifth gear and huge 36mm nut installed (the force to tighten this nut, is insane!):
Beta 2 Engine:
Fit perfectly in our RD1 engine bay, but as optimoprime says, you have to just take a hammer and hit the cross-member where the tranny bottoms out (you have to slightly dent it). I installed 2 new side engine mounts.
I reconnected all electrical connectors, hoses, pipes.
Turn-key Day:
I still remember it was an early Saturday morning in May (yes, 5 months after I started the project) - turn key day! So I bought break-in engine oil. I hear that you shouldn't use synthetic oil, as it's too fine and may not lubricate all engine parts effectively. I think conventional oil is better for breaking in (first time crank), but still not as good as actual racing/break-in engine oil. There was only one place I could find it in, here in Toronto - Performance Improvements. No one else seemed to carry it. The procedure is to turn the engine over and accelerate at idle, to 2500 RPM. Keep there for about 1/2 hour, taking care at engine temperature, oil pressure, and any engine leaks. Because I did this alone, I wrapped a cord around the gas/cruise pulley. I tried turning the engine over. To my surprise, nothing! Lights on the dash were all going on, but no crank. Ah, yes! The hood was open, and so my alarm hood safely switch was not pressed in. Ok, I disabled the alarm. Try again. This was very nerve-wrecking. #@$%@!#$#@!*!!!! The engine turned over NICELY! I was grinning ear-to-ear! So I held the cord at 2500 RPM for half-hour. Guess what - I forgot to check engine temperature. After 1/2 hour, I get in the engine to turn the engine off, and I noticed that the temp needle was beyond the "H". Man, do I regret not having paid attention to it. I was too excited and scared at the same time, that I checked for leaks, was really careful not stay steady at 2500RPM, but of all things, forgot to pay attention to the engine temperature. So what was the problem? My stupid decision. I didn't replace the thermostat. I thought, "if it was working before I removed the engine, it should be working still" - naive way of thinking. I guess from the 5 months of having the engine entirely disassembled, the thermostat got stuck shut. A $10 part may have cost me trouble in the future. So far, everything looks normal.
Anyway, so I replaced the thermostat, drained the break-in oil, and filled it up with conventional oil. I drove it for 100km and changed the oil again and filter. I can't remember when, but I eventually switched to what I always use - synthetic.
The beta 2 engine sounds awesome, runs smoothly, shifts great, and just felt like a brand-new car off the lot. I had replaced everything - brakes, suspension, steering, entirely rebuilt engine, 2.25" full exhaust with 4-2-1 headers. For the next few hundred km, I baby'd the car, smiling everything I drove it. The first time I actually drove it after the breaking in, was to my son's baptism (about 20km total drive). I didn't drive it again from July until December. During this time, I was onto the next phase - painting and bodywork. I'll leave a description of what I did here, for another post.
Only as of Christmas-time, i'm actually driving my car on a daily basis.
Problems:
I hope this helps others.
So I'm running beta 2 head, block, headgasket, ported and polished beta 1 IM, BBTB, beta 2 cover, lightweight ps and crank pulleys, beta 2 oil pan, 2.25" catback exhaust, 1.8ECU, 1.8L pistons, Phantom Grip LSD. I'm N/A, and have no intention of going turbo because of emissions testing.
Now I'm dealing with a front and rear crank seal leaks. I'm not sure why. It may be a slightly out-of-round beta2 crank. I've been thinking of finding a tighter front crank seal. As for the rear, I can use a quick sleeve, but I hear mixed opinions. What do you guys think I should do about these leaks (front and rear)?
Some general tips for anyone thinking/planning to remove their engine:
ENGINE REMOVAL:
main things to remember:
- depressurize the fuel system by disconnecting the electrical connector to the fuel pump (below rear seat) and turning over the engine. The engine will sputter and die.
- with no fuel to the engine, attach your breaker bar with a 19mm socket onto the crank pulley bolt, and crank the engine. This is what people call, "bump start". Either that, or get a really powerful impact gun to break loose of the bolt. If you forget doing this, and instead remove the engine from the engine bay, GOOD LUCK! That bolt will stay on for good (unless you have a really powerful impact gun).
- LABEL everything. Get masking tape, and label all electrical connectors, pipes, hoses, bolts, brackets on both ends where they connect into. I labeled it with the letters of alphabet (eg. I would have 2 "A"s on masking tape - match them up when reconnecting the engine). If you dare think, "nah! I'm not gonna forget this one" THINK AGAIN! You will forget it!
- Instead of putting away bolts, nuts, brackets, try loosely bolting them back up to the component after it was disconnected. For example, say you unbolted and removed your exhaust manifold, take the 16 (or so) bolts/nuts/washers, and loosely tighten them up to the studs on the exhaust side of the cylinder head again. That way you won't lose anything, and there will be no confusion as to where they go.
- When hoisting the engine up from the engine bay, hoist it carefully, making sure nothing snags (eg. the gas cable, electrical connectors). Just do it slowly.
- You can remove the entire engine alone. I did it with absolutely no help from anyone. Just take your time and don't rush.
Let me give you all an update on what happened with the removal and rebuild of my engine:
After my engine was removed, I used engine degreaser, and cleaned up the engine bay really good, as you can see from the pics above. Again, take your time. The end result is worth it. I think it was stocker who suggested I paint the engine bay "black, or grey, or whatever colour dirt is" - he's right. Paint it a light colour, and man, it just seems like it gets dirty so quickly. I also used POR15, one of the best rust paints out there.
I replaced my steering rack, both half shafts, the dust covers on the front spindles, and both front wheel bearings. Unfortunatately, the dust cover over the calipers was practically disintegrated with rust. Replacing it, means that you have to get the bub separated from the spindle, which means that you have to replace the wheel bearings! ANNOYING and expensive. You have to press them (which means you have to take them to your local garage to press them out and the new ones in). My wheel bearing were new, but I had no choice but to replace them again so as to replace the dust cover.
Why did I replace my steering rack, because it was leaking. I got a used one from an RD2, for $100.
Brakes and suspension:
I replaced my front stock calipers with those of a 2001 XG 350, nickel/zinc plated 2005 Kia Spectra rotors, and Goodridge braided stainless steel brake lines. Rears, I kept my stock calipers, nickel/zinc plated cross-drilled/slotted stock-size rotors, Goodridge SS brake lines. I also painted my calipers blue (with a brush versus spray gun). Again, I used POR15 blue paint, and I painted it thick. I found that spray paint peels off easily, and chips easily too, bringing back the rust. Honestly, I spent a lot of money on this car, so I didn't get the calipers (nor headers) powder coated. I strongly suggest you do this over painting (like I did) if you have the money. It's worth it, especially if you live on the rust belt. Changed fluid to DOT 4 synthetic. You can't use DOT 5, for somme reason. I think it has to do with seal damage, but I can't remember now.
I replaced all 4 stock springs and struts (after 130,000km) with 4 stock springs I bought from someone on rdt, some time back, and KYB gr2 struts. The springs were in EXCELLENT CONDITION! I can't remember who I bought it from, but I bet the guy lived somewhere in the states where it didn't snow (much). My stock springs were rusted! I painted my struts with silver POR15. Big time rust removal from upper strut mount area of the body (all 4 sides). I later found out that there are "quick struts" (springs and struts are already pre-assembled, so in hindsight, I would have probably done that instead of replacing/installing each seperately. Apart from the obvious benefit of more work, I hear that it eliminates the need for an alignment, afterwards (not sure if that's true, that's what one mechanic told me).
Wheel alignment - I took it to a local mechanic. The guy tells me that my camber is out-of-spec, and that I need a camber kit. He wanted to charge me $200CDN just for the 4 bolts, one for each side. I decided to follow the wheel alignment diy at elantraclub:
4 wheel alignment diy from elantragtclub
I haven't done it yet, as I'm dealing with another problem I mention below.
Engine:
I took my beta 1 block with my beta 2 cylinder head to a machine shop. The guy told me that my beta 1 block was garbage because there were grooves caused on the crankshaft lobes and where the thrush bearings go, I think. Honestly, I can't remember exactly where the grooves were, that he mentioned, but I think it was that. So I opted to go with the beta 2 cylinder head and beta 2 block. I asked them to shave the block, cylinder head, valve reseating, replace valve stems, cylinder honing, install new pistons (the 1.8L pistons for higher compression), piston rings. They charged me $850CDN. Cylinder head came back immaculous!!! WOW! Worth the $850! Ok, so all of this cylinder head work, was the only thing I fore-went. I had already spent a lot of time on the car, and I knew this was going to delay me further, to learn all about how to do that, buy additional tools, and risk messing something up.
Ok, so I assembled the cylinder head to beta 2 block, with the beta 2 head gasket. When I installed the OBX lightweight crank pulley, the crank bolt wouldn't screw onto the crankshaft. #$%@!!!! I wasn't sure why. Can you guys imagine not being able to bolt the crank bolt!! Anyway, I risked it and used the rotary tool with a 1/64" cut-off wheel, and grooved the begining threads of the crank bolt! I was scared! Thankfully, after a couple of hours of going at it, I got the crank bolt to screw into the crankshaft. I Installed the oil pump, water pump, oil pan (beta 2), timing belt (new tensioner and pulley), light weight power steering pulley. The next problem was finding out all of the belt sizes given that I was using a smaller crank pulley, light-weight beta 1 power steering pulley, beta 2 water pump pulley, beta 1 a/c pulley/pump. The combinations made finding the right belt sizes, a project on its own. I followed the diy on here for the belt sizes, as a GUIDE. Anyone reading that thread will see that there was no concensus on what belt size to use, even for the same year RD/RD2. I can post what size belts I used, for anyone interested.
Beta2 Transmission:
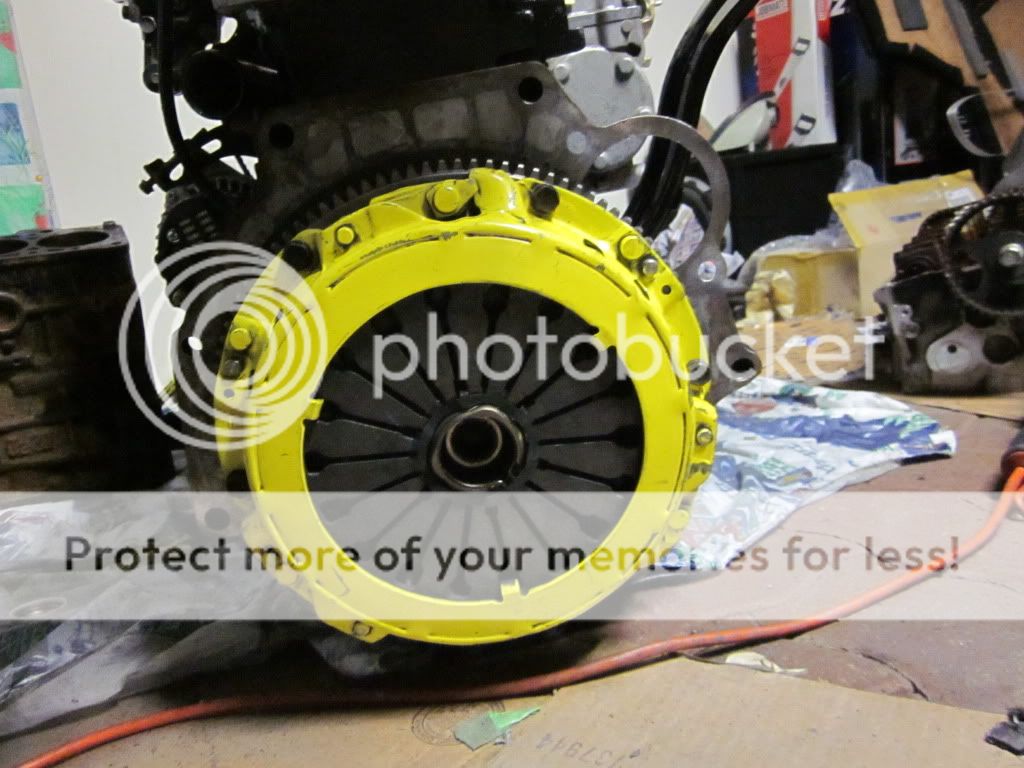
I took the transmission apart to bear-bones to install a the Phatom Grip LSD. I learned a great deal! I want to write a diy on doing this. It was fun! So after the tranny was back together, I installed the lightweight XTD flywheel, newer stock clutch that I bought from a member on here (it was advertised as having only 5,000km - the guy wasn't lying. The clutch is in GREAT shape!). I used the Mitsubishi alignment tool to get the clutch aligned with the engine. Everything installed perfect.
I still find that on the beta2 tranny it's still hard to get into first gear, just like it was on my beta1 tranny, unless you pretty much come to 10km/h.
First and second gears removed:
Closeup of the stock open differential:
Tranny case without differential:
Stock open differential with pin removed (this pin can only be punched out this way, not the other way):
Spider gear in the stock differential:
Phantom Grip installed in differential:
Differential put back in the case:
Top case installed:
Fifth gear and huge 36mm nut installed (the force to tighten this nut, is insane!):
Beta 2 Engine:
Fit perfectly in our RD1 engine bay, but as optimoprime says, you have to just take a hammer and hit the cross-member where the tranny bottoms out (you have to slightly dent it). I installed 2 new side engine mounts.
I reconnected all electrical connectors, hoses, pipes.
Turn-key Day:
I still remember it was an early Saturday morning in May (yes, 5 months after I started the project) - turn key day! So I bought break-in engine oil. I hear that you shouldn't use synthetic oil, as it's too fine and may not lubricate all engine parts effectively. I think conventional oil is better for breaking in (first time crank), but still not as good as actual racing/break-in engine oil. There was only one place I could find it in, here in Toronto - Performance Improvements. No one else seemed to carry it. The procedure is to turn the engine over and accelerate at idle, to 2500 RPM. Keep there for about 1/2 hour, taking care at engine temperature, oil pressure, and any engine leaks. Because I did this alone, I wrapped a cord around the gas/cruise pulley. I tried turning the engine over. To my surprise, nothing! Lights on the dash were all going on, but no crank. Ah, yes! The hood was open, and so my alarm hood safely switch was not pressed in. Ok, I disabled the alarm. Try again. This was very nerve-wrecking. #@$%@!#$#@!*!!!! The engine turned over NICELY! I was grinning ear-to-ear! So I held the cord at 2500 RPM for half-hour. Guess what - I forgot to check engine temperature. After 1/2 hour, I get in the engine to turn the engine off, and I noticed that the temp needle was beyond the "H". Man, do I regret not having paid attention to it. I was too excited and scared at the same time, that I checked for leaks, was really careful not stay steady at 2500RPM, but of all things, forgot to pay attention to the engine temperature. So what was the problem? My stupid decision. I didn't replace the thermostat. I thought, "if it was working before I removed the engine, it should be working still" - naive way of thinking. I guess from the 5 months of having the engine entirely disassembled, the thermostat got stuck shut. A $10 part may have cost me trouble in the future. So far, everything looks normal.
Anyway, so I replaced the thermostat, drained the break-in oil, and filled it up with conventional oil. I drove it for 100km and changed the oil again and filter. I can't remember when, but I eventually switched to what I always use - synthetic.
The beta 2 engine sounds awesome, runs smoothly, shifts great, and just felt like a brand-new car off the lot. I had replaced everything - brakes, suspension, steering, entirely rebuilt engine, 2.25" full exhaust with 4-2-1 headers. For the next few hundred km, I baby'd the car, smiling everything I drove it. The first time I actually drove it after the breaking in, was to my son's baptism (about 20km total drive). I didn't drive it again from July until December. During this time, I was onto the next phase - painting and bodywork. I'll leave a description of what I did here, for another post.
Only as of Christmas-time, i'm actually driving my car on a daily basis.
Problems:
- didn't replace the thermostat
- when I put the tranny back, I didn't properlly align the bolt for the reverse gear. Trying to put this bolt back in when it wasn't quite aligning with the threading of the reverse gear, was a b****!!! I did the best I could without removing the tranny from the engine bay, and tearing it apart again.
- When you install all accessories back in the engine (oil pump, water pump) and brackets, apply Permatex Grey Gasket maker to ALL bolts! Don't do this, and believe me, you'll get oil leaks from bolts. Do this to ALL BOLTS! 3 weeks ago I had to tear down all accessories and do this on ALL bolts, and re-torque them.
- When you install the headgasket and torque down the cylinder head, you'll notice torque specs to be something like: M10 30Nm, +65degrees, +65degrees. I didn't know what the 65 degrees meant. Yeah, make fun of me. It was a learning experience, and it's great to look back at errors - it's not all success. Well, I eventually got oil leaks between the cylinder head and block. Some research, and somehow I stumbled on what this meant. It means that after you torque it to 30Nm, go back, and (following the same torque sequeence), torque an additional 65 degrees, and then again (following the same torque sequence), torque it yet again, an additional 65 degrees.
- Crank seal and cam seal - make sure it's FLUSH with the engine. Don't go in further than that, or you may develop leaks. Also, make sure you get new seals from the dealer. It's just one aftermarket part you can't afford to have fail on you.
- forget trying to bang cam/crank seals in (even with a large socket over it) - you'll most likely distort it. Best to come up with a way to drive it/screw it in. I used my "Face-saver shaving powder" bottle. Picture of this to follow.
- the oil dipstick tube - when you put it back, make sure you put a new ring, or you may get blow-by
- replace the PCV valve or you may cause excessive engine pressure, causing your cam and crank seals to leak
I hope this helps others.
So I'm running beta 2 head, block, headgasket, ported and polished beta 1 IM, BBTB, beta 2 cover, lightweight ps and crank pulleys, beta 2 oil pan, 2.25" catback exhaust, 1.8ECU, 1.8L pistons, Phantom Grip LSD. I'm N/A, and have no intention of going turbo because of emissions testing.
Now I'm dealing with a front and rear crank seal leaks. I'm not sure why. It may be a slightly out-of-round beta2 crank. I've been thinking of finding a tighter front crank seal. As for the rear, I can use a quick sleeve, but I hear mixed opinions. What do you guys think I should do about these leaks (front and rear)?
03-18-2012, 01:19 AM
#24
Senior Member

Join Date: Dec 2008
Location: Floating around the AUDM
Posts: 3,837
Likes: 0
Received 0 Likes
on
0 Posts
Vehicle: X3 Sprint, S-Coupe Turbo
Nice work dude, this is such a nice build.
Do you have any more tips on working with the transmission? I'd like to pull apart my alpha transmission, but I've never done it before.
Do you have any more tips on working with the transmission? I'd like to pull apart my alpha transmission, but I've never done it before.
03-18-2012, 08:29 AM
#25
Senior Member
Join Date: Mar 2008
Location: Canada
Posts: 1,682
Likes: 0
Received 0 Likes
on
0 Posts
Vehicle: 1991 Impulse RS
Congrats on getting it done! This is the first time I read this thread and when I saw that you and your wife were having a baby, my first thought was "this isn't getting done". LOL! Nice work proving me wrong.
03-18-2012, 12:27 PM
#26
Senior Member
Thread Starter
Join Date: Nov 2007
Location: Toronto, Canada
Posts: 429
Likes: 0
Received 0 Likes
on
0 Posts
Thanks, guys!! Having a baby, a wife, a demanding job, isn't easy to find time to work on the tib. Believe it or not, my only time would be from 1am until about 6am, sleep from 6 - 9am, to be at work at 10am. Even today, I still pull those crazy hours to finish up the tib. I still have:
- crank oil leaks to fix (front and rear)
- cleanup interior
- one last coat of body paint (you'll see on another thread I create that my first time painting had its flaws)
I'd say about a month of work and I'll be done with all the work on the tib, for good
Ok, here are some more pics for you guys to enjoy:
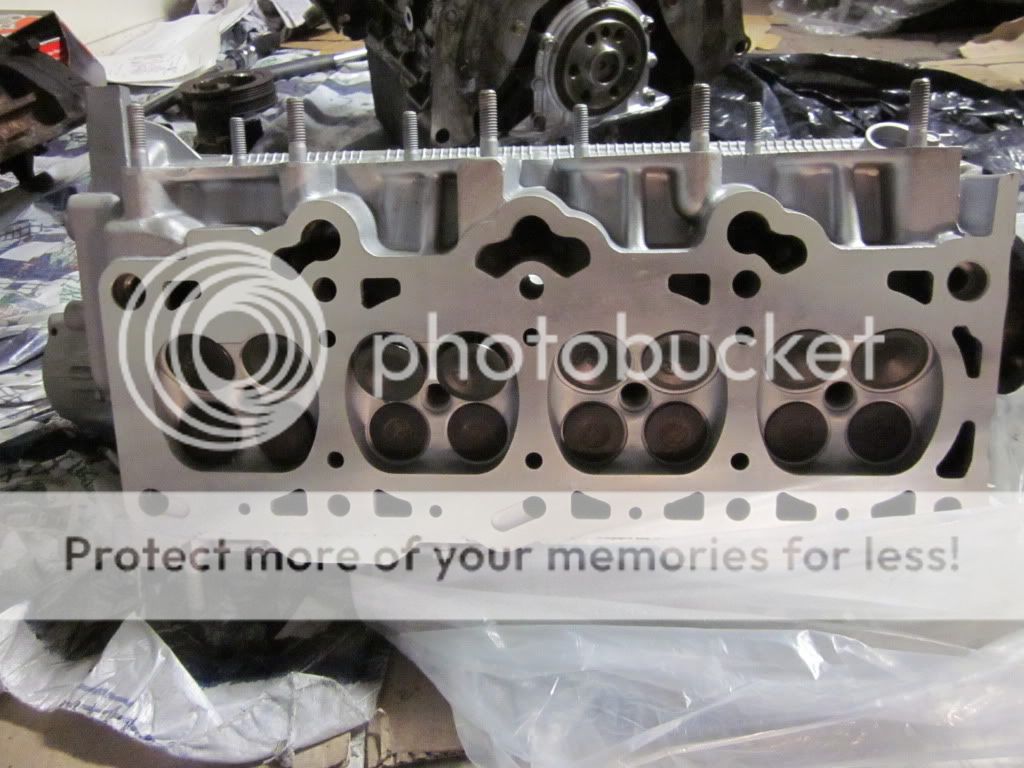
Cylinder head back from machine shop:
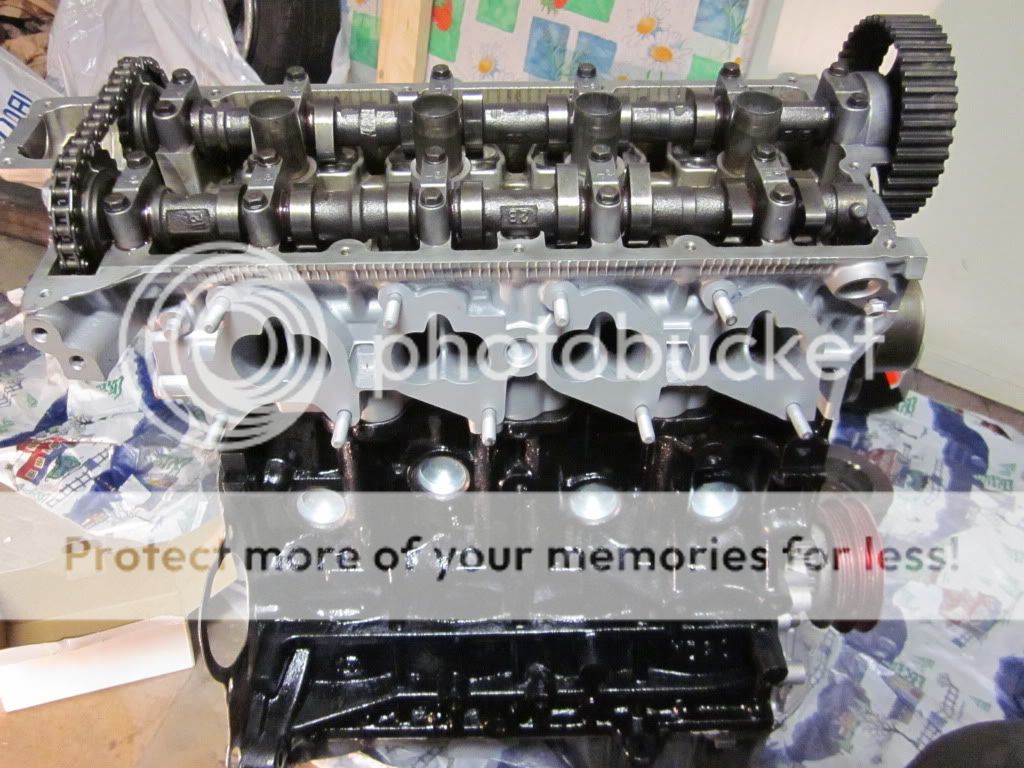
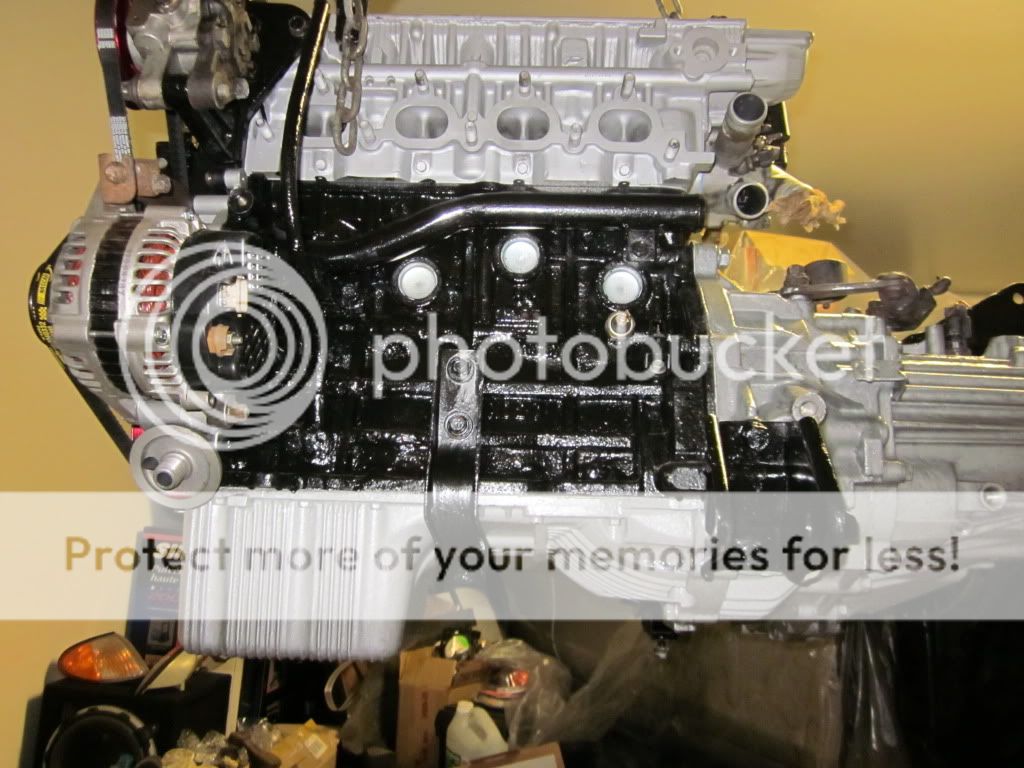
Cylinder head mounted to block, crank pulley installed, and idle pulley:
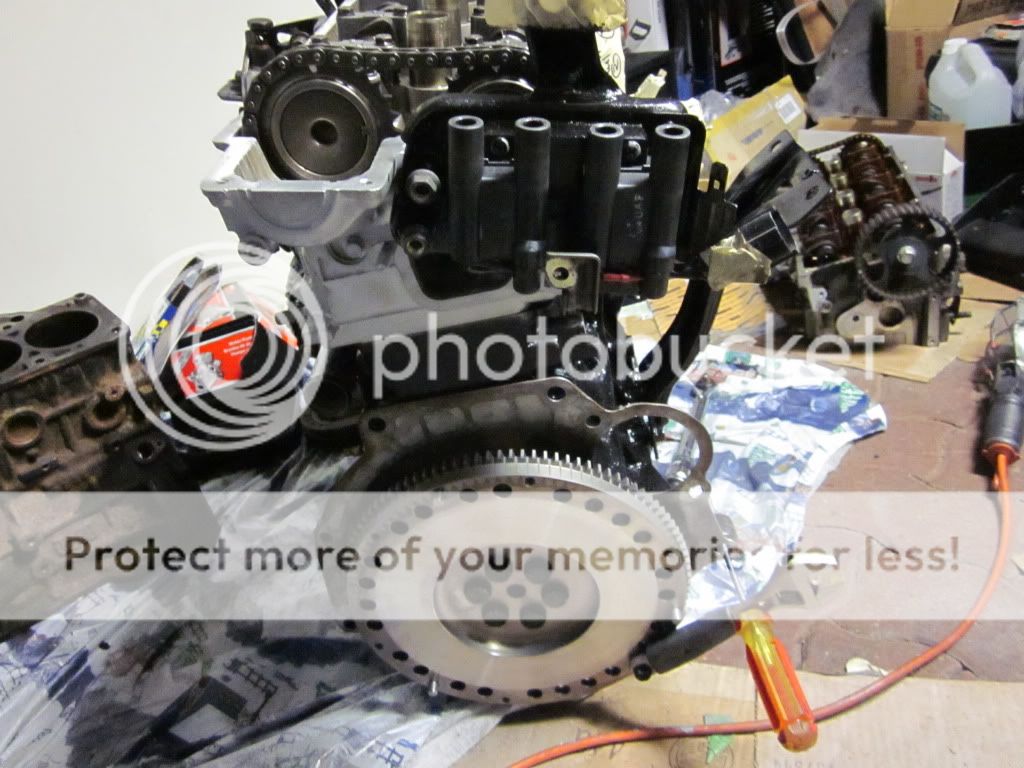
Flywheel installed, ready for clutch. You can see my rd1 block and cylinder head on the background:
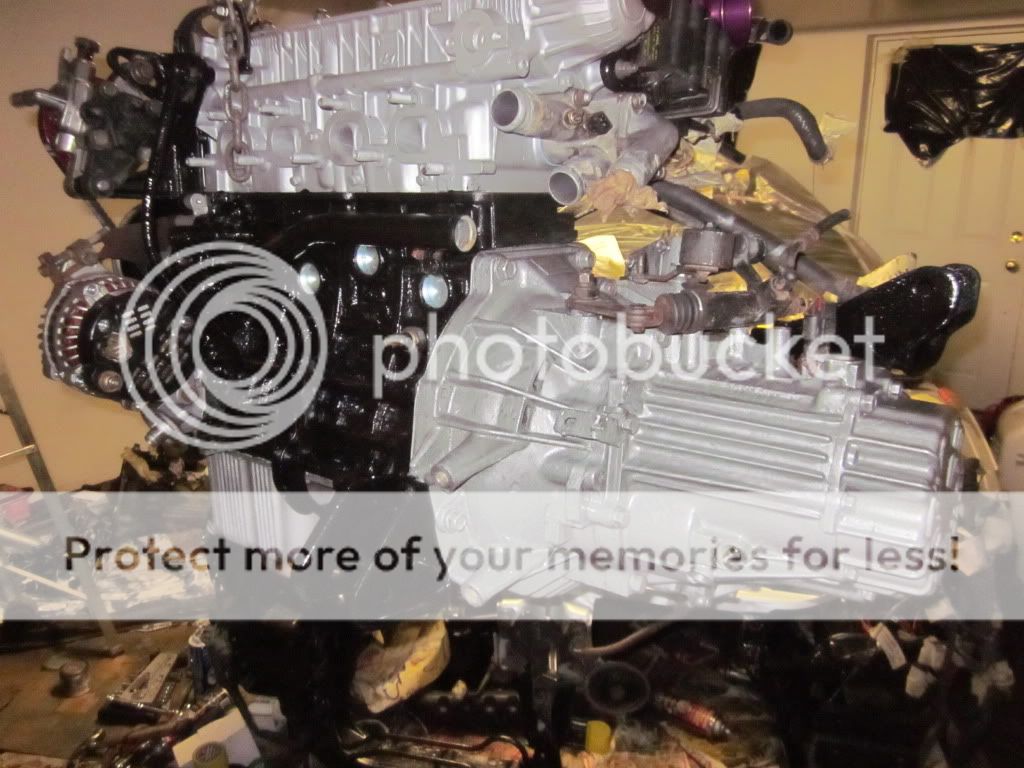
Clutch installed, ready for tranny.
Tranny mounted:

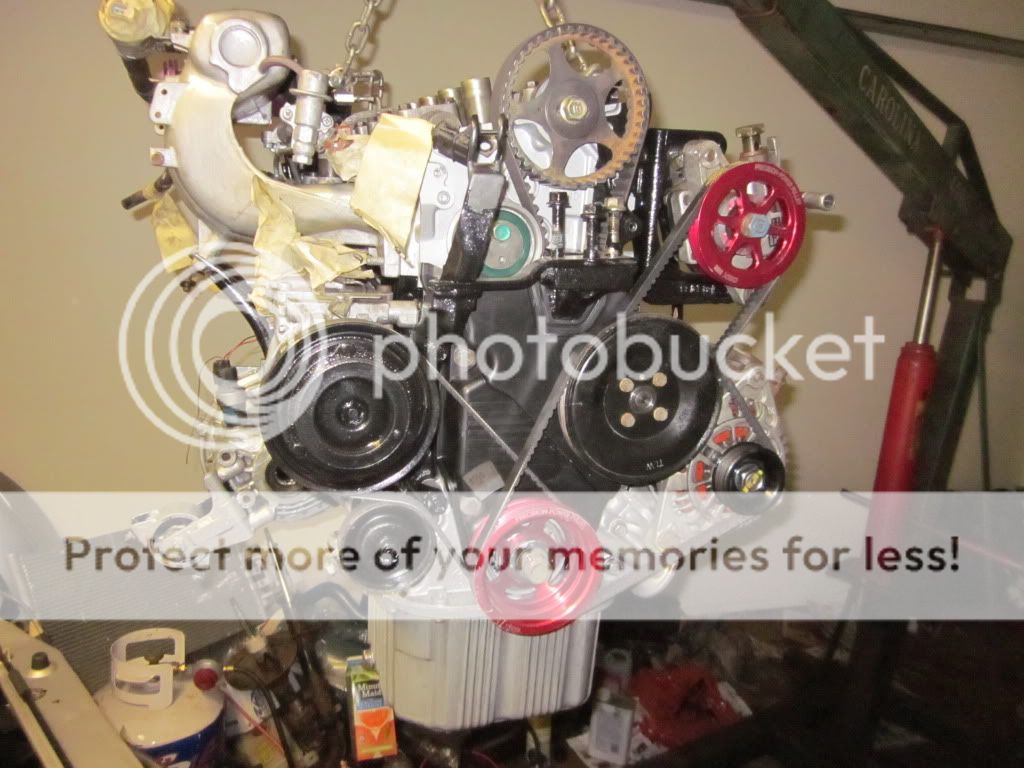
Power steering, a/c, water pump, alternator, timing belt - installed:
IM, starter, sensors - installed:
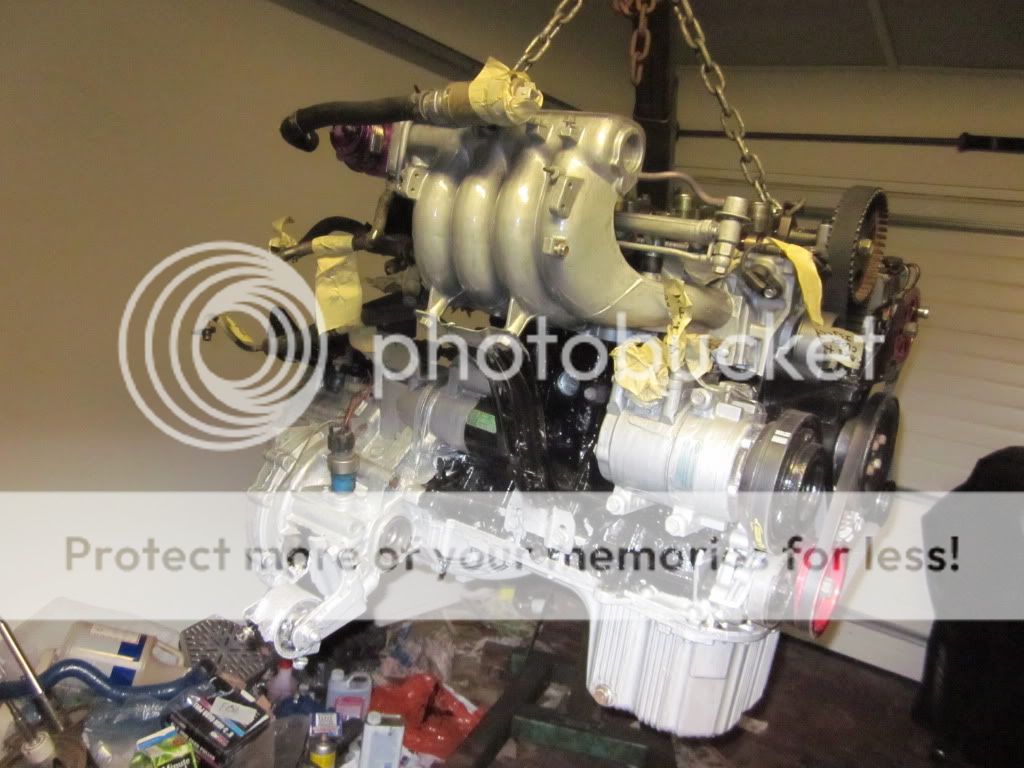
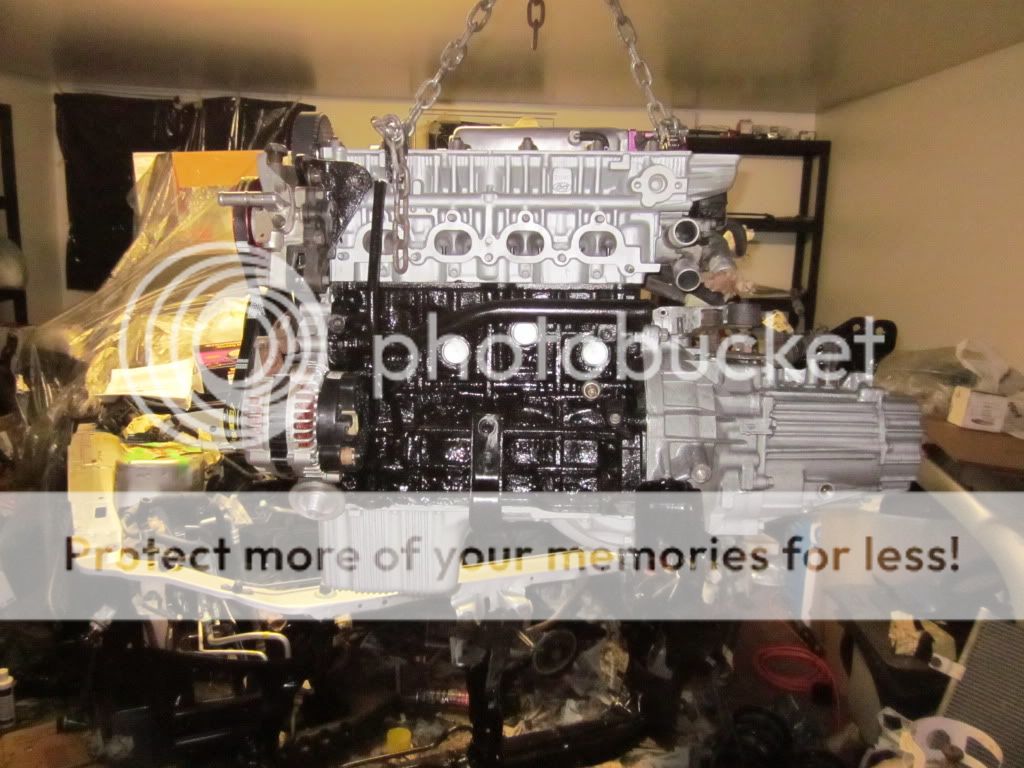
Engine ready to be installed:
Let's install that engine
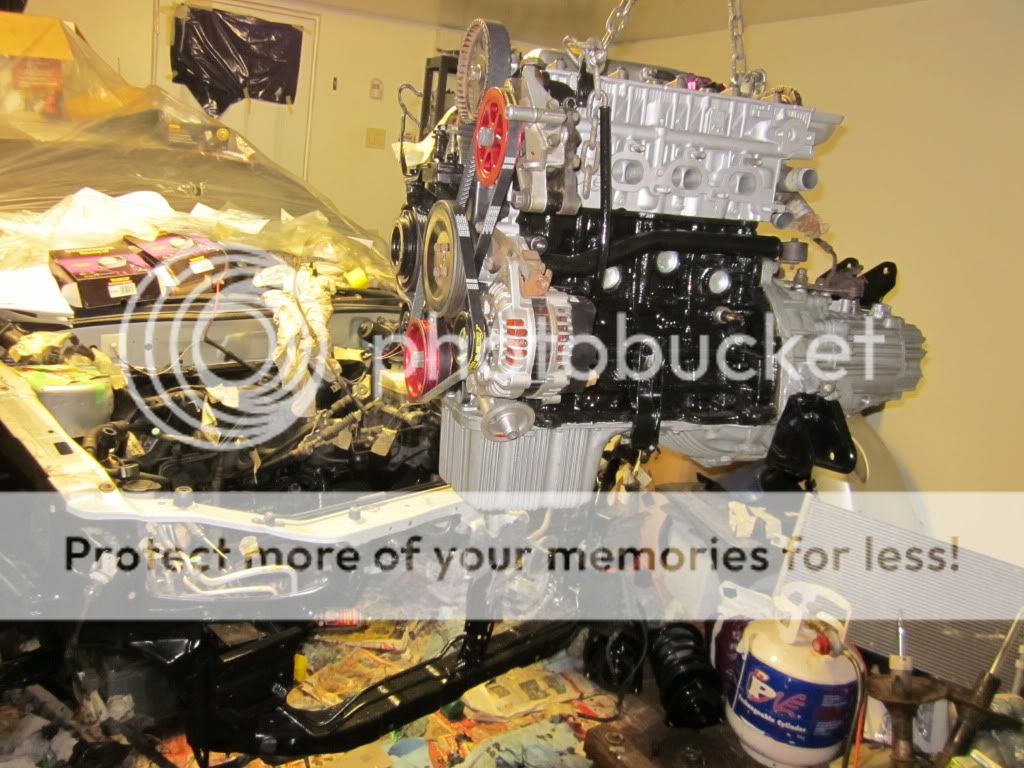
My RD1 cylinder head right after it was removed (for contrast):

More pics to come ...
- crank oil leaks to fix (front and rear)
- cleanup interior
- one last coat of body paint (you'll see on another thread I create that my first time painting had its flaws)
I'd say about a month of work and I'll be done with all the work on the tib, for good
Ok, here are some more pics for you guys to enjoy:
Cylinder head back from machine shop:
Cylinder head mounted to block, crank pulley installed, and idle pulley:
Flywheel installed, ready for clutch. You can see my rd1 block and cylinder head on the background:
Clutch installed, ready for tranny.
Tranny mounted:
Power steering, a/c, water pump, alternator, timing belt - installed:
IM, starter, sensors - installed:
Engine ready to be installed:
Let's install that engine
My RD1 cylinder head right after it was removed (for contrast):
More pics to come ...

 03-20-2012, 08:49 PM
#29
Junior Member
Join Date: Feb 2012
Location: Bristol, CT
Posts: 14
Likes: 0
Received 0 Likes
on
0 Posts
Vehicle: 1998 Tiburon
I've got a quick question. You said you were thinking about painting your Evo hood. What kind of paint did you or were you going to use? I want to paint mine. My buddy told me to use high heat black paint. To me that sounds like a solid idea, but if you've actually done it & used different paint I might as well do it that way.
03-22-2012, 11:21 AM
#30
Senior Member
Thread Starter
Join Date: Nov 2007
Location: Toronto, Canada
Posts: 429
Likes: 0
Received 0 Likes
on
0 Posts
^^ I painted the outside/top with BASF Limco Acrylic-enamel 2 stage base and clear coat metallic paint. The inner (engine-facing) part of the hood, I painted it with high-heat generic black paint.
For sure, man! Your thread was exactly what helped me start this up and know what to expect. Thanks for having post it. 
For sure, man!
Your thread was exactly what helped me start this up and know what to expect. Thanks for having post it.