
Rd1 - Painting Headlight Bezels
 03-05-2010, 11:03 PM
#1
Senior Member

Thread Starter
Join Date: Mar 2010
Location: Southern, Ohio
Posts: 524
Likes: 0
Received 0 Likes
on
0 Posts
Vehicle: 1999 Hyundai Tiburon
I just got some spare headlights to try this with, so I wanted to see if anyone had any pictures of RD1 headlights taken apart. The pics in SOCKS thread http://www.rdtiburon.com/index.php?showtop...ting+headlights are not viewable, plus RD2 headlights are different. So I don't know what I need to paint once I get it apart, I don't know how many pieces there will be and so on....
So anybody have some pics they can post? I figure the whole process of doing this will be pretty easy, I just need to make sure I paint the correct things. I done the corners on my own pretty goo. And now I shall move onto the headlights, which I will have a set for sale coming soon as long as all goes well.
I guess once I do get them apart, I can post pictures and somebody can tell me then....Thanks for the help.
EDIT:
Also, has anyone tried the 3M Headlight Restoration System from Autozone? I'm gonna give it a whirl tomorrow.
 03-05-2010, 11:34 PM
#2
Moderator


Join Date: Mar 2009
Location: wamego, kansas
Posts: 5,280
Likes: 0
Received 0 Likes
on
0 Posts
Vehicle: 2001 hyundai tiburon
i have used the 3m kit. it worked good but what really helped it was i used flitz polishing compound after all the 3m kit steps.
in terms of the headlight bezels take a look at splintercel's headlights. he has a COTM pic with a good pic of the lights. basically take all the chrome off.
in terms of the headlight bezels take a look at splintercel's headlights. he has a COTM pic with a good pic of the lights. basically take all the chrome off.
03-06-2010, 12:21 AM
#3
Senior Member
Thread Starter
Join Date: Mar 2010
Location: Southern, Ohio
Posts: 524
Likes: 0
Received 0 Likes
on
0 Posts
Vehicle: 1999 Hyundai Tiburon
What's the better stuff to use? The liquid probably seems like it would be easier to use. http://www.flitz-polish.com/index.php?page...;externalId=538
Seems like all the online stuff I see restoring lights involving the sanding process use the power type stuff. Does it just depend on what your wanting to work with?
EDIT:
Hell, maybe the paste seeing as how they sell that in their own little headlight restoration kit.
Seems like all the online stuff I see restoring lights involving the sanding process use the power type stuff. Does it just depend on what your wanting to work with?
EDIT:
Hell, maybe the paste seeing as how they sell that in their own little headlight restoration kit.
03-06-2010, 12:25 AM
#4
Moderator

Forget about polishing that 'chrome' it comes off with a rag and water. You need to sand it off and paint over it. They say once you go black, you never go black.
03-06-2010, 12:42 AM
#5
Senior Member
Thread Starter
Join Date: Mar 2010
Location: Southern, Ohio
Posts: 524
Likes: 0
Received 0 Likes
on
0 Posts
Vehicle: 1999 Hyundai Tiburon
^^^ We are referring to the stuff for the outside of the lights, not the inside. The reflective chrome stuff on the inside just gets painted right over doesn't it? That is how I done the corners anyhow.
03-06-2010, 03:10 AM
#6
Senior Member

Join Date: Aug 2007
Location: Inglewood, CA 90302
Posts: 303
Likes: 0
Received 0 Likes
on
0 Posts
I recently did this to my automatic tibby, ill post pics of the result smile.gif the only thing bad of the process was my headlight restoration, since it was my 1st time trying to restore them I over sanded them and damaged the layer 02.gif but from that mistake came experience so I tried it on my fx headlights and they came out great. I still need to finish em so ill post pics of that when I have time.
03-06-2010, 07:15 AM
#7
Senior Member

Join Date: Jul 2004
Location: New London, Tx AKA The Middle of Nowhere
Posts: 547
Likes: 0
Received 0 Likes
on
0 Posts
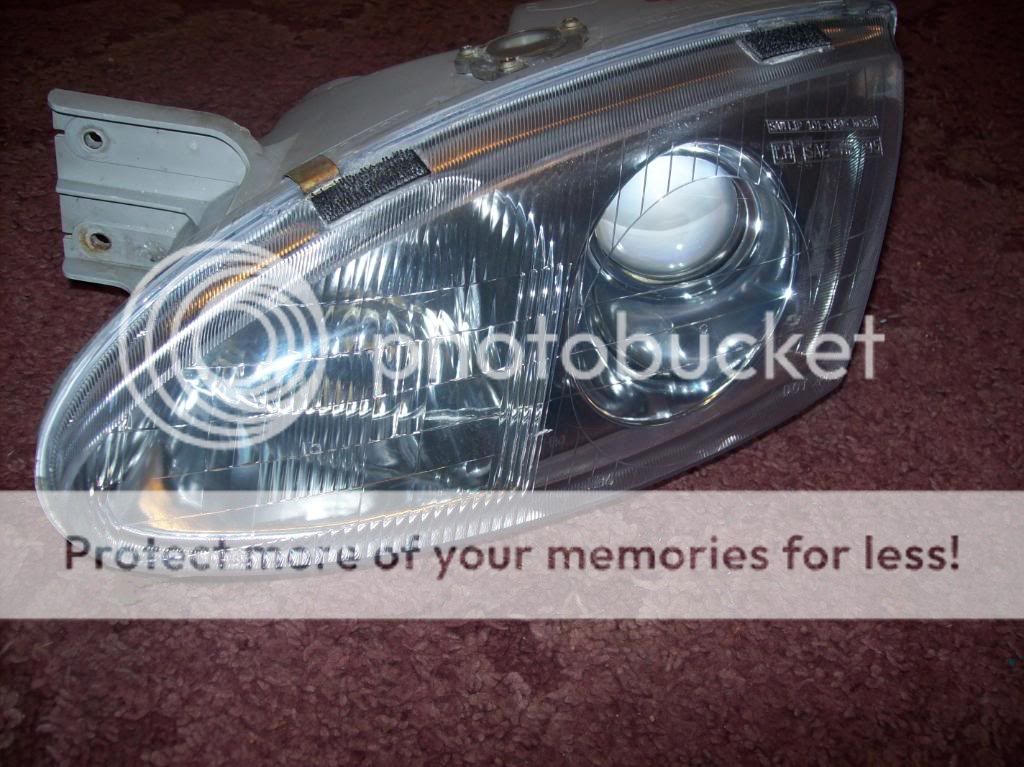
The headlights are slightly different than the corners. The corners only have the fake chrome paint on them which it is best to just sand off and paint over it. The headlights, however, have an actual reflective surface in one section that you'll want to keep. It's for the brights I believe.
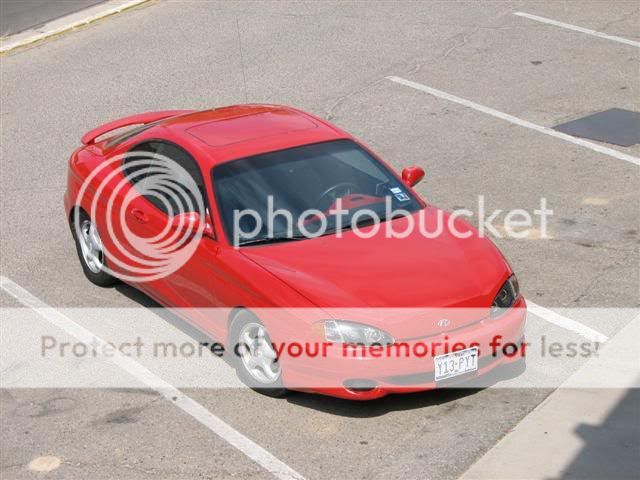
I unfortunately don't have a pic that shows this clearly, but you can kind of see it in the above pic if you look at the passenger side light. The inner (toward the center of the car) has a reflector to disperse the light. The other set (the dim) are projectors and thus don't have a reflector.
If I were you, and you have stock taillights, I'd also paint the "chrome" part of the taillights. I did mine and it looks 100% better. Be EXTREMELY careful taking them apart though, or you'll warp them.
**EDIT**
Aha! Maybe this one will help:
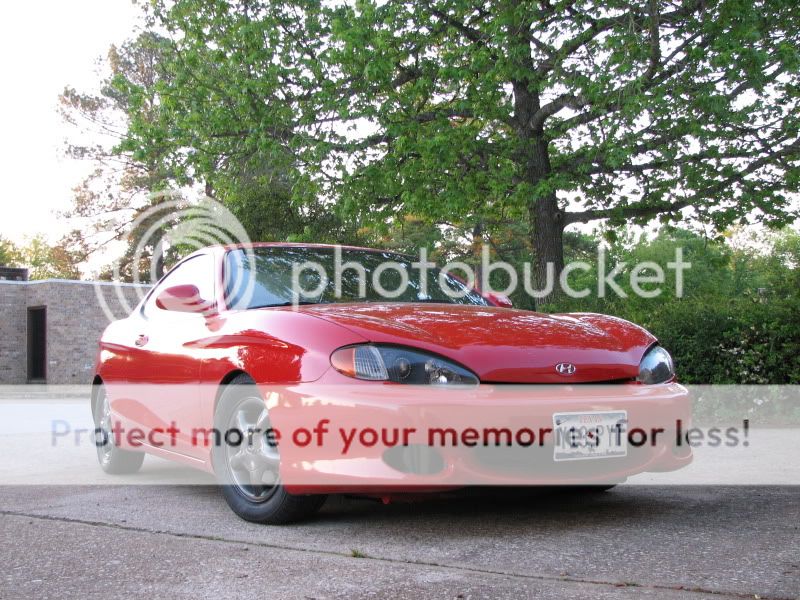
03-06-2010, 07:32 PM
#8
Senior Member
Thread Starter
Join Date: Mar 2010
Location: Southern, Ohio
Posts: 524
Likes: 0
Received 0 Likes
on
0 Posts
Vehicle: 1999 Hyundai Tiburon
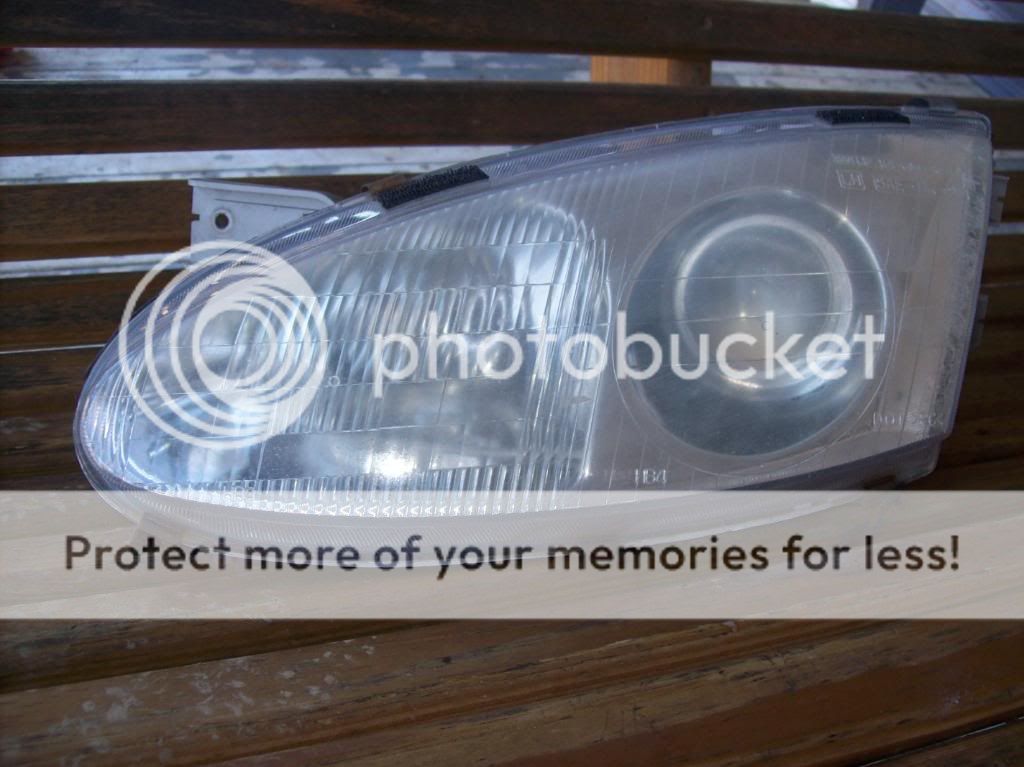
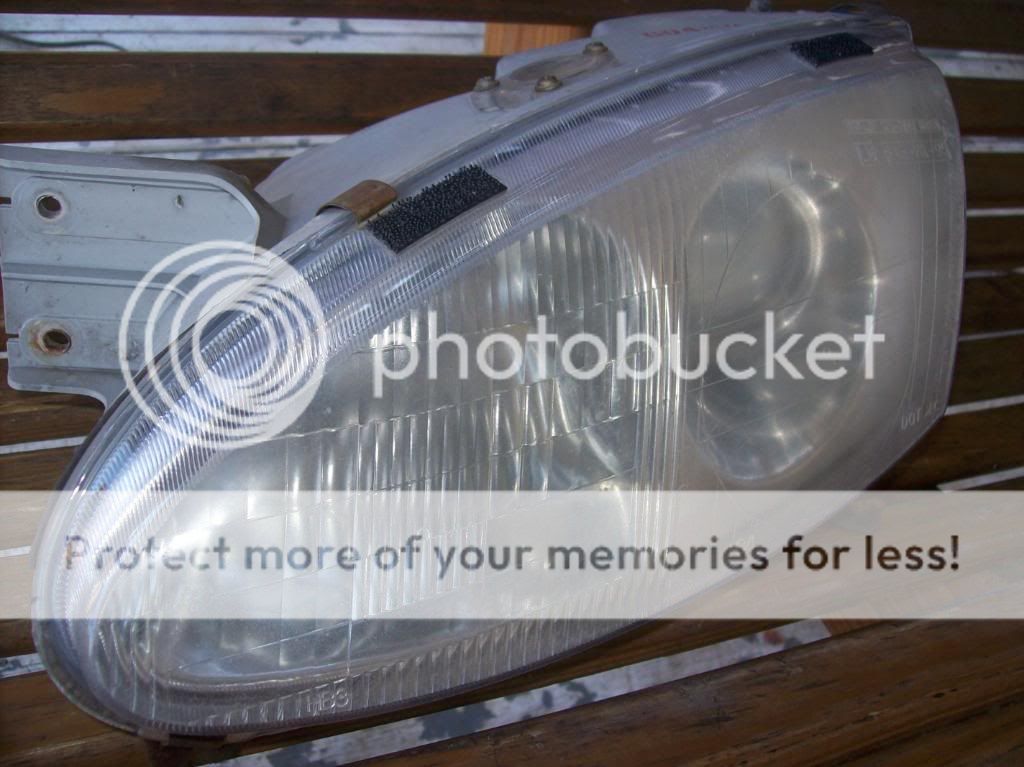
Looks pretty good. I had thought painting the whole thing black would look good. But looking at your pic, it looks better like that. Painting it all black would be a bit much I think. I have HID's, so i wasn't worried about losing brightness from my high beams. Do you by chance have a closer up pic of your headlights? And how long did you put them in the oven for? about 5 minutes?
Also, today I tried the 3m restoration kit, that stuff is absolutely amazing. I will post pics of the difference later.
LATER:
This is the two pics of before.
This is restored!!!
Pics doesn't even do justice as to how big the difference really is.
Also, today I tried the 3m restoration kit, that stuff is absolutely amazing. I will post pics of the difference later.
LATER:
This is the two pics of before.
This is restored!!!
Pics doesn't even do justice as to how big the difference really is.
03-07-2010, 10:12 AM
#9
Senior Member
Join Date: Jul 2004
Location: New London, Tx AKA The Middle of Nowhere
Posts: 547
Likes: 0
Received 0 Likes
on
0 Posts
I don't, and my camera is in a million pieces after an experiment gone wrong sad.gif. Camera + 30 foot drop = fail.
I have HIDs as well, but the reflector still helps to disperse the light over such a wide area. That's what a couple of quick tests pointed to anyway.
About 4-5 minutes yeah. I just watched it and tested it after 4 1/2. After it starts cooling back off, pop it back in for a minute and then work on it some more. I was able to get less than a minute per reheat for work time. It's one of those things you do on feel more or less. Just have several different screw drivers handy and some welding gloves or oven mitts.
I also find it handy to remove the old sealant while it's warm as opposed to later... And I've always just resealed them with clear rtv.
3m is the shiznit fing02.gif.
03-09-2010, 12:07 AM
#10
Senior Member
Thread Starter
Join Date: Mar 2010
Location: Southern, Ohio
Posts: 524
Likes: 0
Received 0 Likes
on
0 Posts
Vehicle: 1999 Hyundai Tiburon
I took apart both headlights successfully today. A lot less guts inside of them then I thought there was, now i obviously know what to paint. Now the question is this: Whats the easier way to get the chrome stuff off, a rag and hot water, or sanding it off. If it is sanding, what grit do i use?
<div class='quotetop'>QUOTE (SplinterCeL @ Mar 6 2010, 10:15 AM) <{POST_SNAPBACK}></div><div class='quotemain'>If I were you, and you have stock taillights, I'd also paint the "chrome" part of the taillights. I did mine and it looks 100% better. Be EXTREMELY careful taking them apart though, or you'll warp them.</div>
You have pics of what the taillights look like? I have nightshades over mine, and I just ain't really fond of that look now that it has been on there a while.